
I Built the World’s Worst AI Headset (On Purpose)
You can't poke your eye out in VR.
That's probably a plus, because the way I got this idea was awfully close to that. I placed a bi-convex lens from an old Google Cardboard kit and held it up to my eye to see how close I could get my eye to a tiny OLED.
I was looking directly into this project; Tiny Movies
This is the kind of cheap OLED that you might find in all kinds of products that need a small self illuminating display. They are cheap, plentiful and easy to hook up to a large assortment of microcontrollers.
I got my eye pretty close, but I wanted to get even closer. Maybe I could find a lens that I could double up with the bi-convex one and get the OLED to fill my entire FOV (Field of Vision)
One hemispherical and one bi-convex a Google Cardboard kit meant covering FOV
A few months prior I had picked up a pair of 1.5" hemipherical lenses from TAP plastics with no intended use; They just looked cool. The technical name might be Plano-Convex. Plano meaning flat, so I could right on the screen and Convex so that it would magnify the image. So I subsequentially discovered if you put the PC lens on the OLED and then held the bi-convex really close to your eye, you could bring the image really close to your eye and nearly cover your FOV.
Perfect! Now I will build the worlds worst AR system.

Check out the chunky Plano-Convex lens in series witht bi-convex lens in this cutaway. It looks heavy and way ahead on the headset CG. I assumed this would be really uncomfortable, but it's ok with the top head strap mounted forward of the nose.

Another render from the top of the device. In this image it's easier to see the inline mockup of the ESP32-CAM -> OLED -> PC lens -> BC lens.
ESP32Cam, could I get a video feed onto a 128x64 screen?
Hold on, for augmented reality, especially really bad 128x64 monochrome reality I need to make sure that I can get an image from the ESP32-CAM.
Back to the breadboard
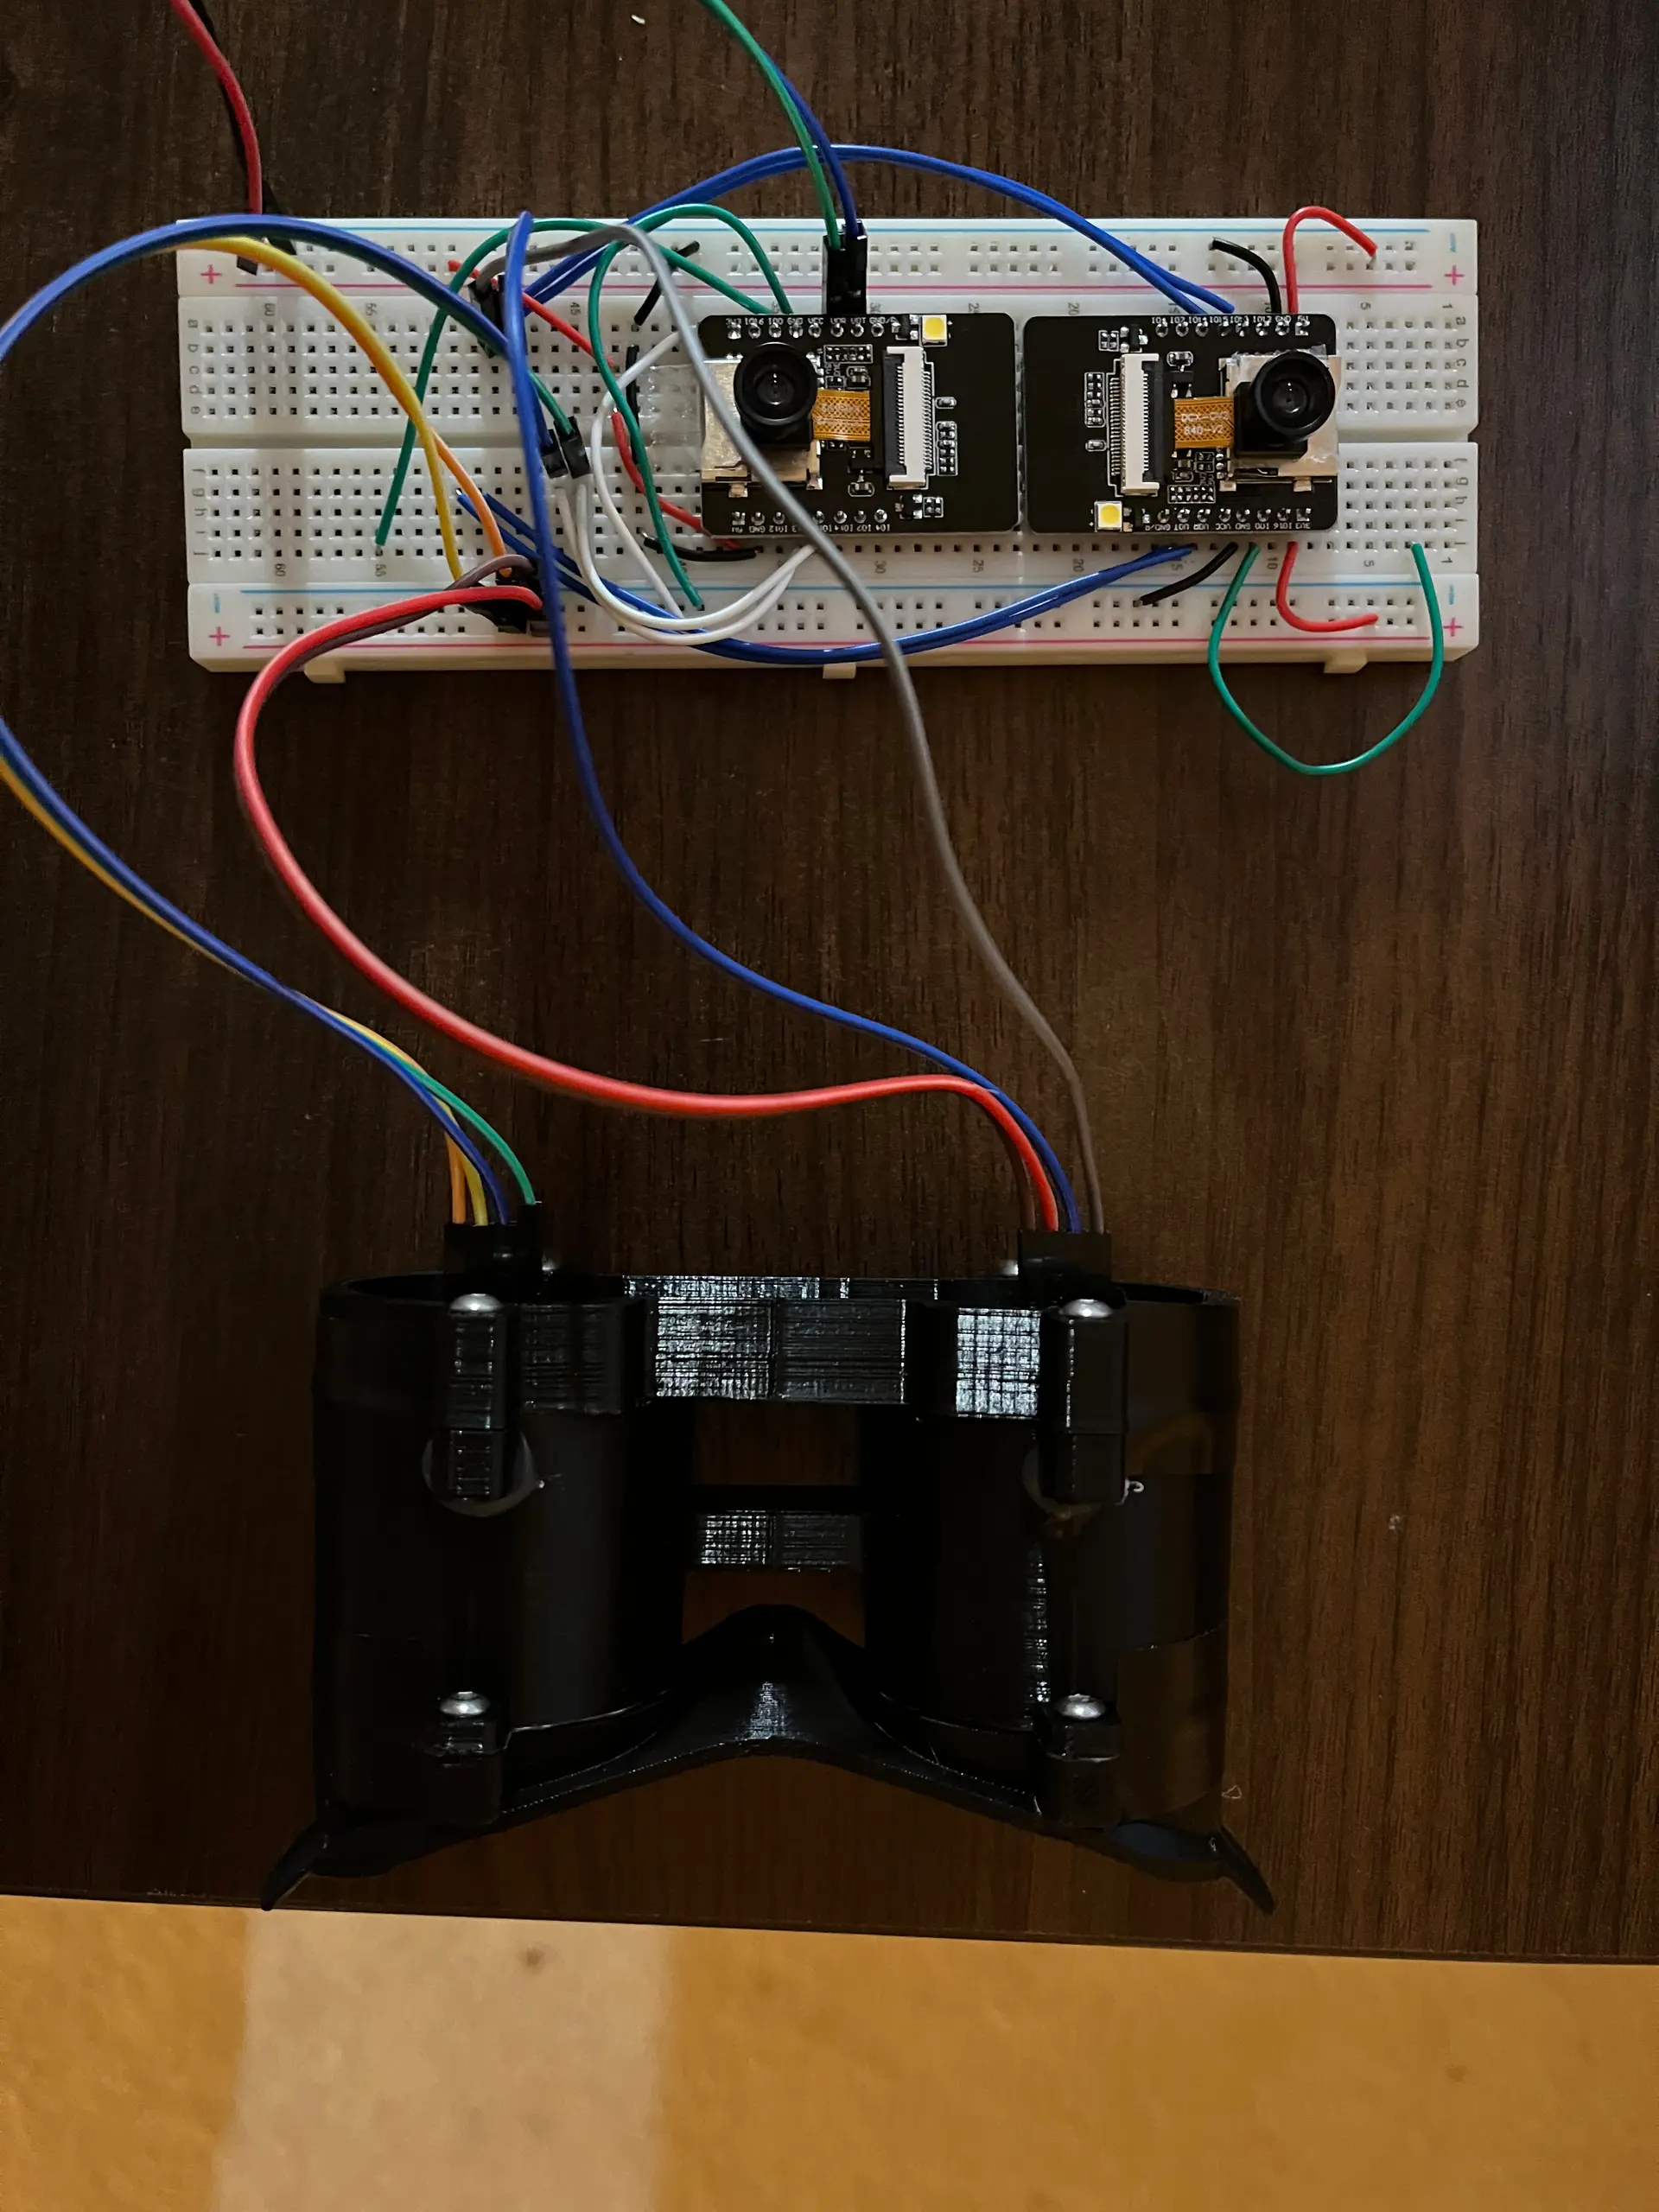
Getting the image off the camera framebuffer is easy, the challenge is to setup all the camera flags correctly and swap the pixels so that the images align correctly in the eyepieces. I think I started with a simple threshold filter for the feed and then fed the pixels right into the OLEDS. I don't have a photo of the original breadboard prototype, just this one where I already have the first 3d printed model hooked up. I added dithering, edge detection and motion detection modes that you can swap with the button the primar ESP32.
Walking in an AR wonderland
This video sort of approximates the experience of looking through the device while you explore your environment. It's really hard to translate the experience of hacking your visual system. After a few minutes of wearing the device it begins to feel normal. Even at 128x64 you can easily navigate indoor spaces and perform tasks. The limited resolution does not blind you functionally as you might expect.
Self control
A short press on the control button switches filters. The button is pressed, the primary controller sets the value on two wires connected on the secondary controller to tell it what mode to use. That makes for a max of 4 modes from 2 wires, not a lot, but enough to communicate which of the 3 filters to use. There is probably a better way to do this, but I wanted to save the serial port for debugging and not use Wi-Fi to keep it simple or Bluetooth becuase its software stack overflows the memory I need for filters.
What if it had AI?
My ESP32-CAM powered rover talked to a multimodal model, so why couldn't this thing? Maybe I could use the unused 'LONG PRESS UX' to activate an AI mode. Maybe you could hold the button and ask the AI what you were looking at? Sometimes, when I am looking through this thing I think it might be nice to know. Am I looking at an empty bookshelf or a set of stairs, this would be a good thing to ask about. You could always take off the headset, but I'd like to pretend. The ESP32-CAM has no microphone, and unlike the rover this AI interaction would really be enhanced by voice. You'll need to prompt the AI somehow, and just sending it images from the framebuffer without context won't get you too far.
iOS app and architecture
Did you know that you can write an iOS app that not only has access to high performance voice transcription, but also can run a mini webserver which can act as proxy for the ESP32 to the multimodal model? Now I do, so I created a simple two scene iPhone app that can run in the background and react to button presses on headset. For debugging purposes there's a remote control scene that shows all the back and forth communication between the three systems. The primary scene just shows the state of the conversation.
A little Arduino Code
This is close to the code that I used to communicate with the app.
The ESP32-CAM sets itself up as a WiFi Access Point and then it can communicate withe iOS client. Reciprocatively, the iPhone can talk to the headset at the ESP32's gateway address. This works great for fast interdevice communication and the iPhone can still use it's LTE connection to connect to the internet to talk to AI APIs.
Here's the prompt that I used:
                promptText = """
                Describe what you see in this image naturally and concisely. Do not mention that you're looking at an image or camera feed. Focus on the main subject or activity.

                CRITICAL: Respond ONLY with valid JSON. Do not include ANY text outside the JSON object. Do not use quotes inside the text values - use simple words only.

                Respond with this exact JSON structure:
                {
                    "tts_text": "brief description here",
                    "oled_text": "short",
                    "analysis": "observation",
                    "type": "visual"
                }

                Rules for tts_text:
                - Maximum 10 words
                - No quotes or special characters
                - Simple, direct language
                - Example: I see a person working at a desk

                Rules for oled_text:
                - Maximum 16 characters
                - No quotes or special characters
                - Example: Person at desk
                """

            case .voice:
                promptText = """
                Analyze this ESP32 camera image. Do not mention that you're looking at an image unless specifically relevant. User asked: "\(question)"

                Respond with JSON containing:
                1. "tts_text": Clear, natural answer (1-2 sentences)
                2. "oled_text": Very short version (under 16 chars) for small display
                3. "analysis": Detailed visual analysis
                4. "type": "visual"

                Example good responses:
                - "I see a person working at a computer"
                - "There's a coffee mug on a desk"
                - "Someone is standing in the hallway"

                Focus on: people, objects, activities, colors, positions.
                """
            }
Works pretty good, still lot's of room for improvement.
Prototype app
The left scene shows the hands off interface, and the right side a controller / debugging interface.
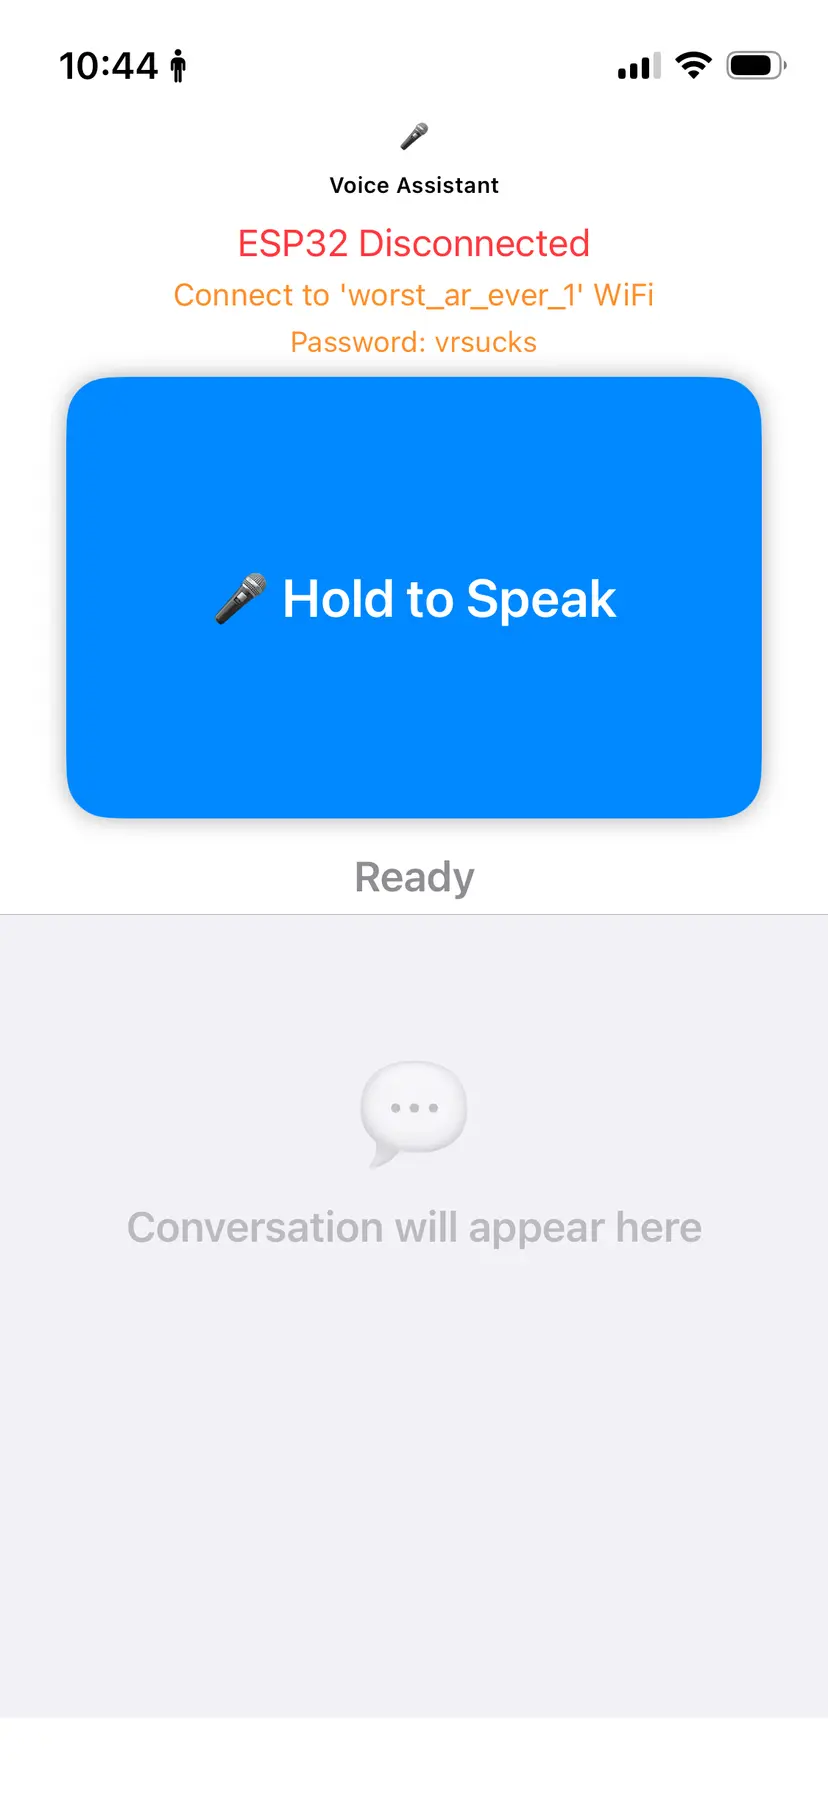
On the hands off interface prototype, I put just the basics:
- Status
- Speak
- conversation
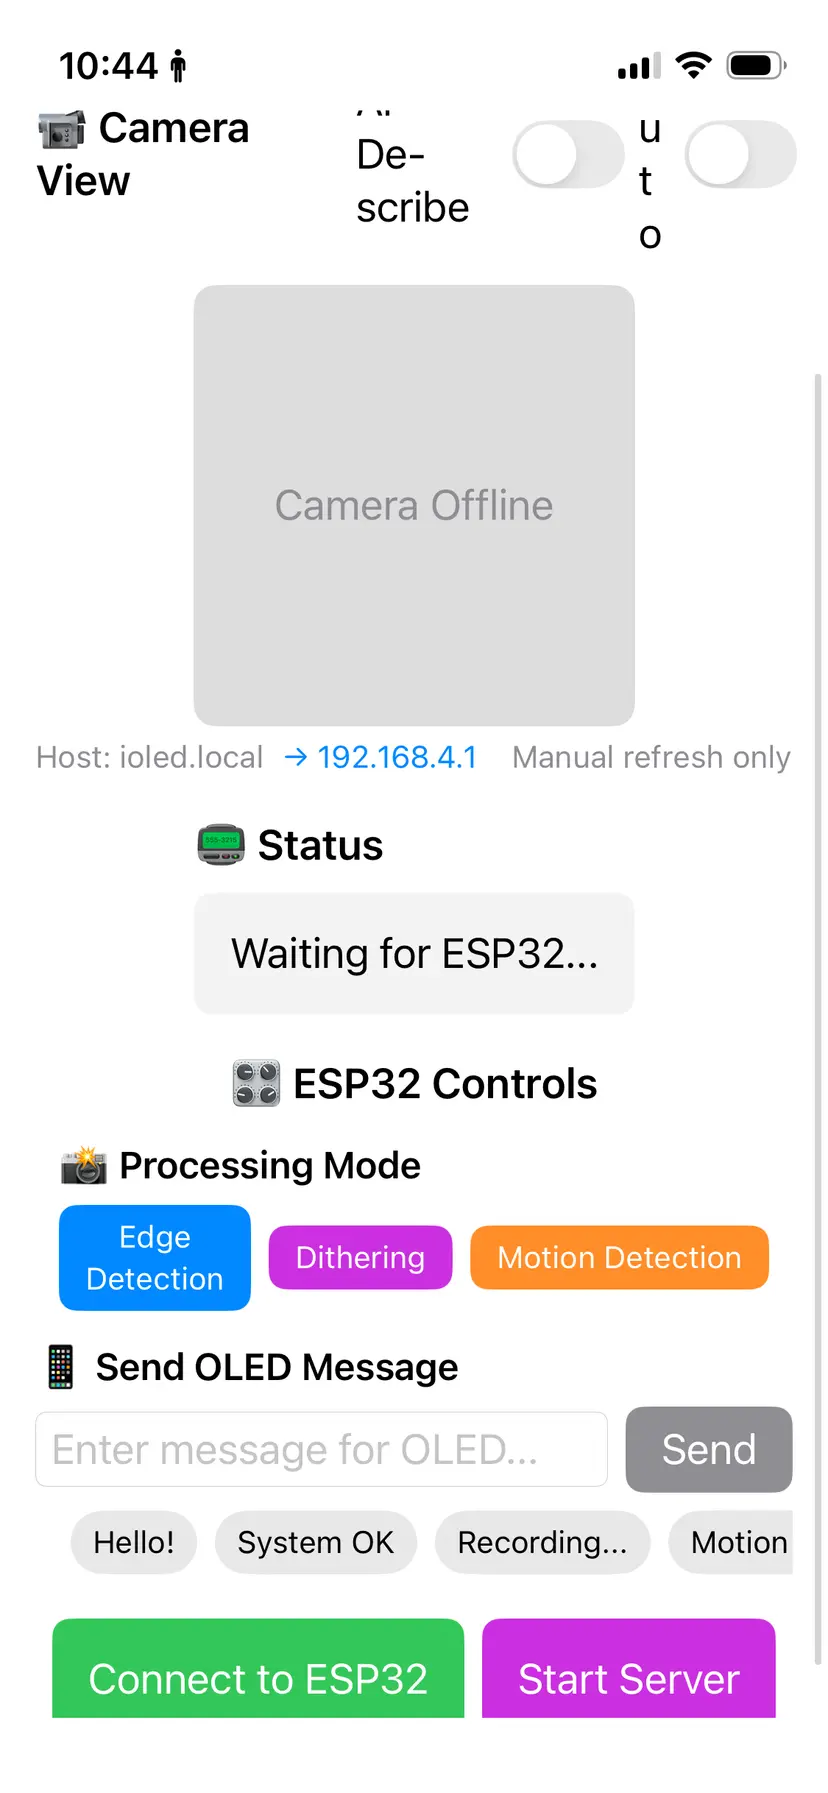
Swiping right opens the camera and display controls
- View the camera
- ESP32 Status
- Set the viewers filter mode
- Place a message on the OLED
- And some buttons to START and STOP the server / connect to the ESP32.
It's a prototype for the interaction between the Headset and the AI model, so forgive the disregard for the iOS design system.
The AI experience
When you're wearing the headset, you look at something, hold the button on the headset and you'll hear and feel haptic feedback from the phone. Now you can state your prompt, release the button and shortly thereafter receive an answer from the phone. Yes, you'll need to keep the device on your person during the experience but the iPhones audio setup is superb and the experience is surprisingly reliable effective.
"A first-person perspective (POV) looking down a flight of stairs."
- o4
Wow, great response and completely pertinant to the moment, thanks AI.
If you've worked with older models, you would quickly infer that I needed to work on my system prompt to make it more useful for a person wearing a vision hacking personal assistant on their face. As a micro product, this is really an area with a great big 80/20 potential for improvement.
V2, make it a little more compact by creating a custom circuit board
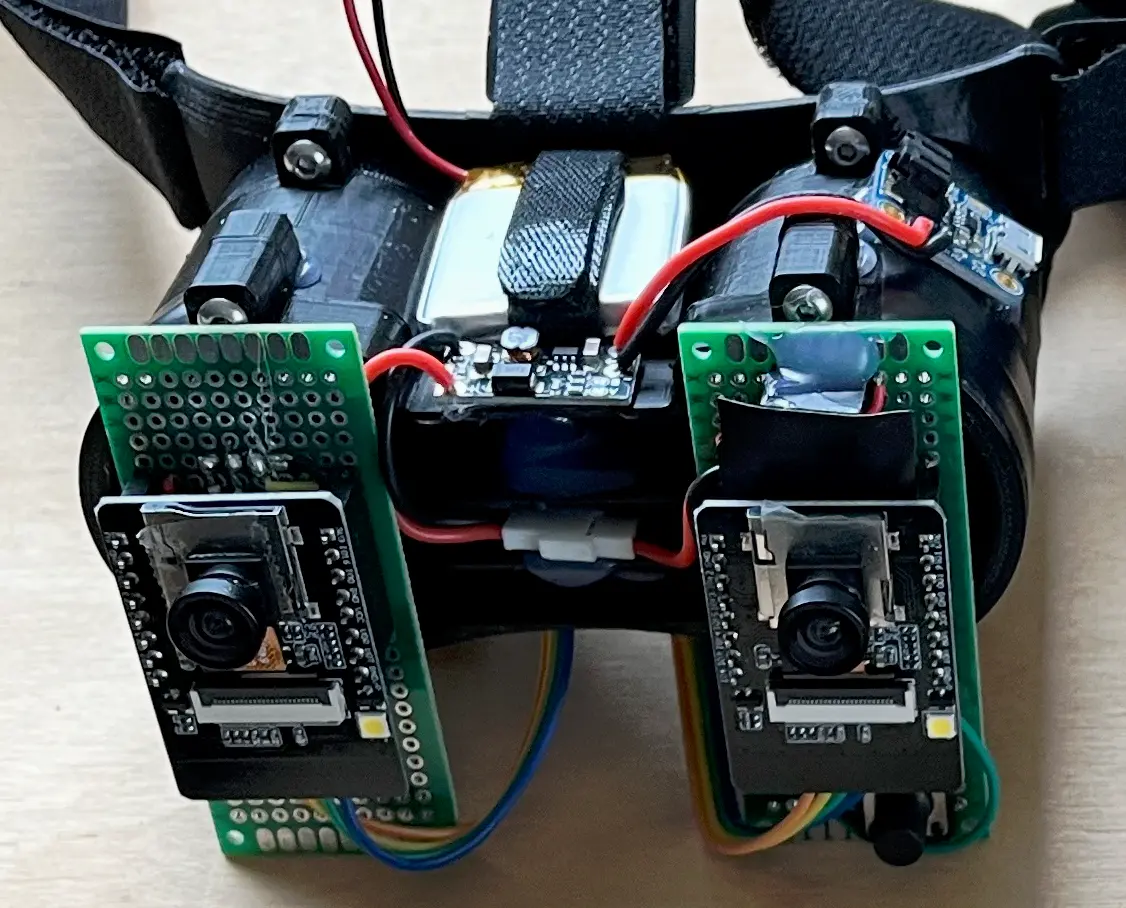
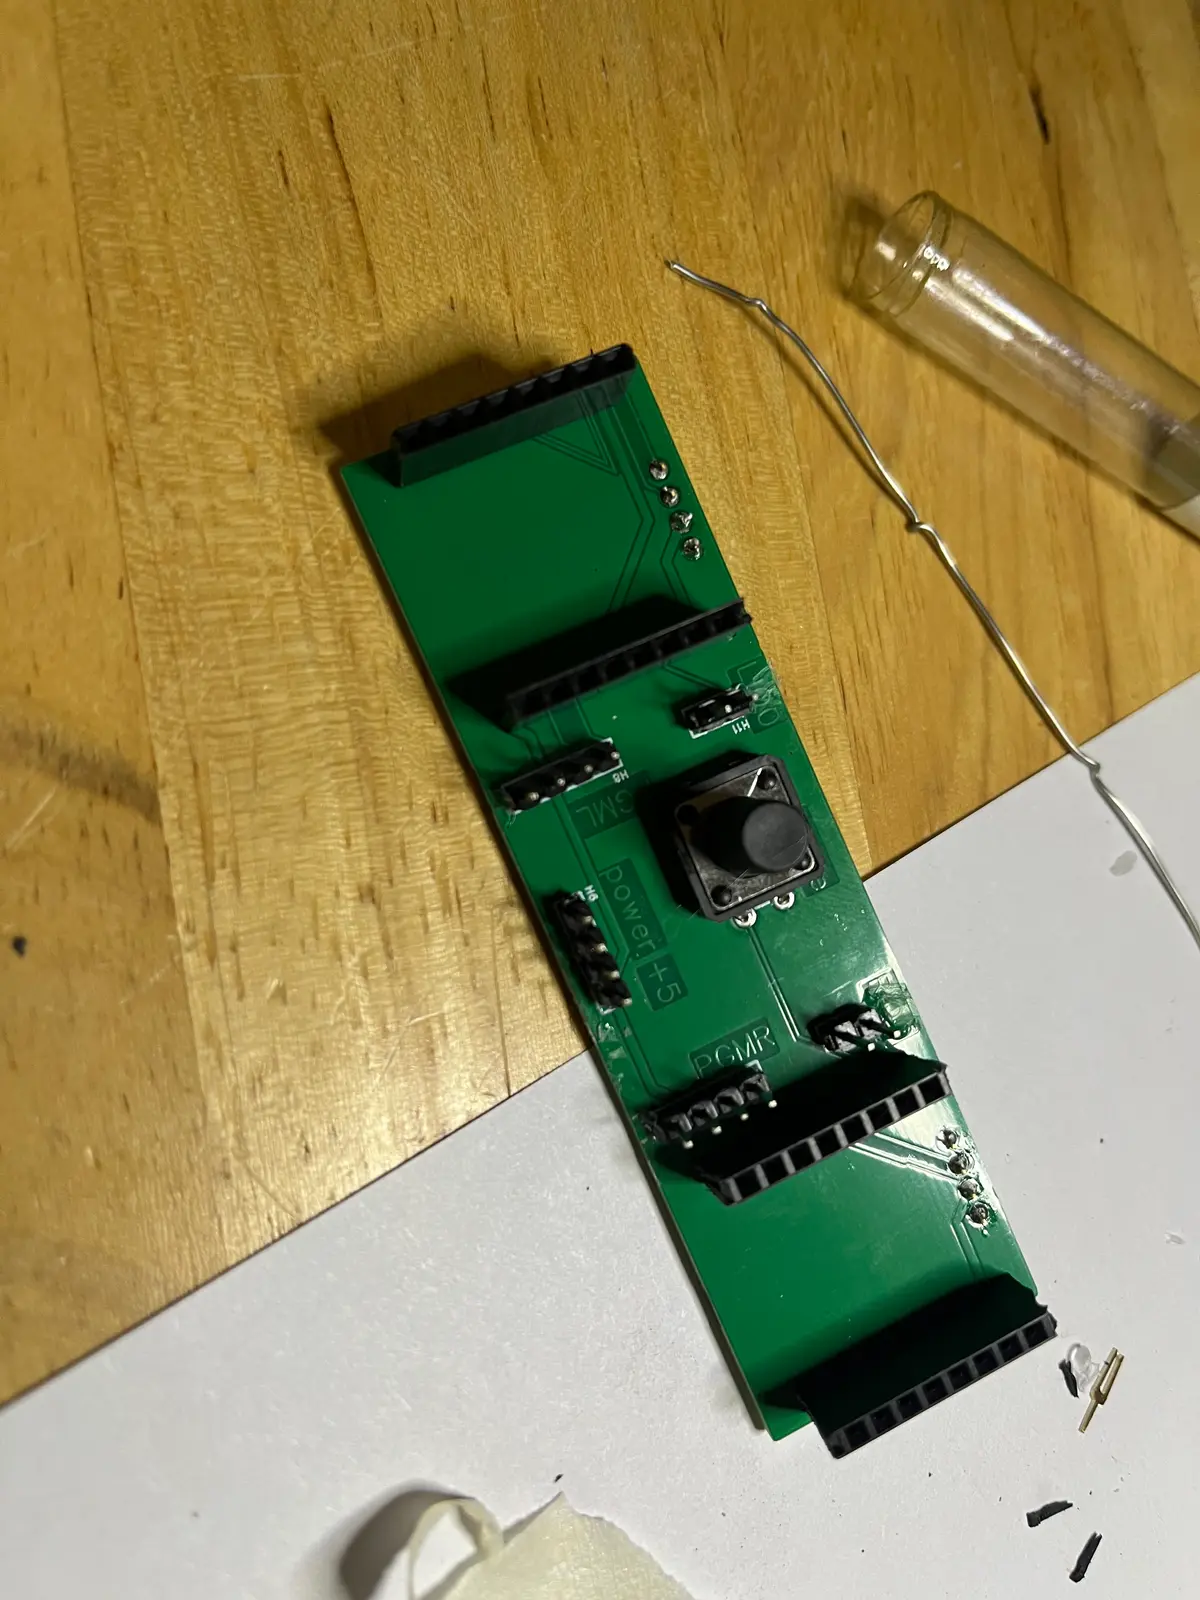
Take a look at this hand-soldered protoboard masterpiece. If you could see the mess on the back side of the board, you would be really surprised when I told you that both boards fired up on the first try. In fact the only issue that I had was getting the rotation correct from the camera to the display. Looking closely At the lenses on the headset you might also notice a non standard wide-angle lens on the ESP32-CAMs. The standard lenses that come with most of these devices give a tunnel effect when you wear the headset because the internal lenses are designed to fill your FOV.
First Board
If you've thought about trying to design your own PCB boards, I would recommend EasyEDA pro based on my personal experience. I have a lot of experience designing and hand wiring circuits but I've never used CAD or EDA for circuit design. Learning the basics of the design to manufacturing process was very interesting, and you can't beat the experience of having 5 boards you designed show up in your mailbox and then work the first time you solder and plug in your components.
Simple Schematic

Next time I'll use labels, but this design is simple I didn't need to.
2 Layer Pcb Design,

The next board will have labels on any pin that is used for debugging or programming, that way I don't have to look at the schematic or remember which UART wire goes where.
Test board
Not a very interesting image, just using pin headers to test the board before I permanently solder in the more expensive components.
Final, compact design
This is the final design for this project, you can see that I've cleaned up the design and hidden the newly compacted circuit board.

A 3MF for you to look At
User testing
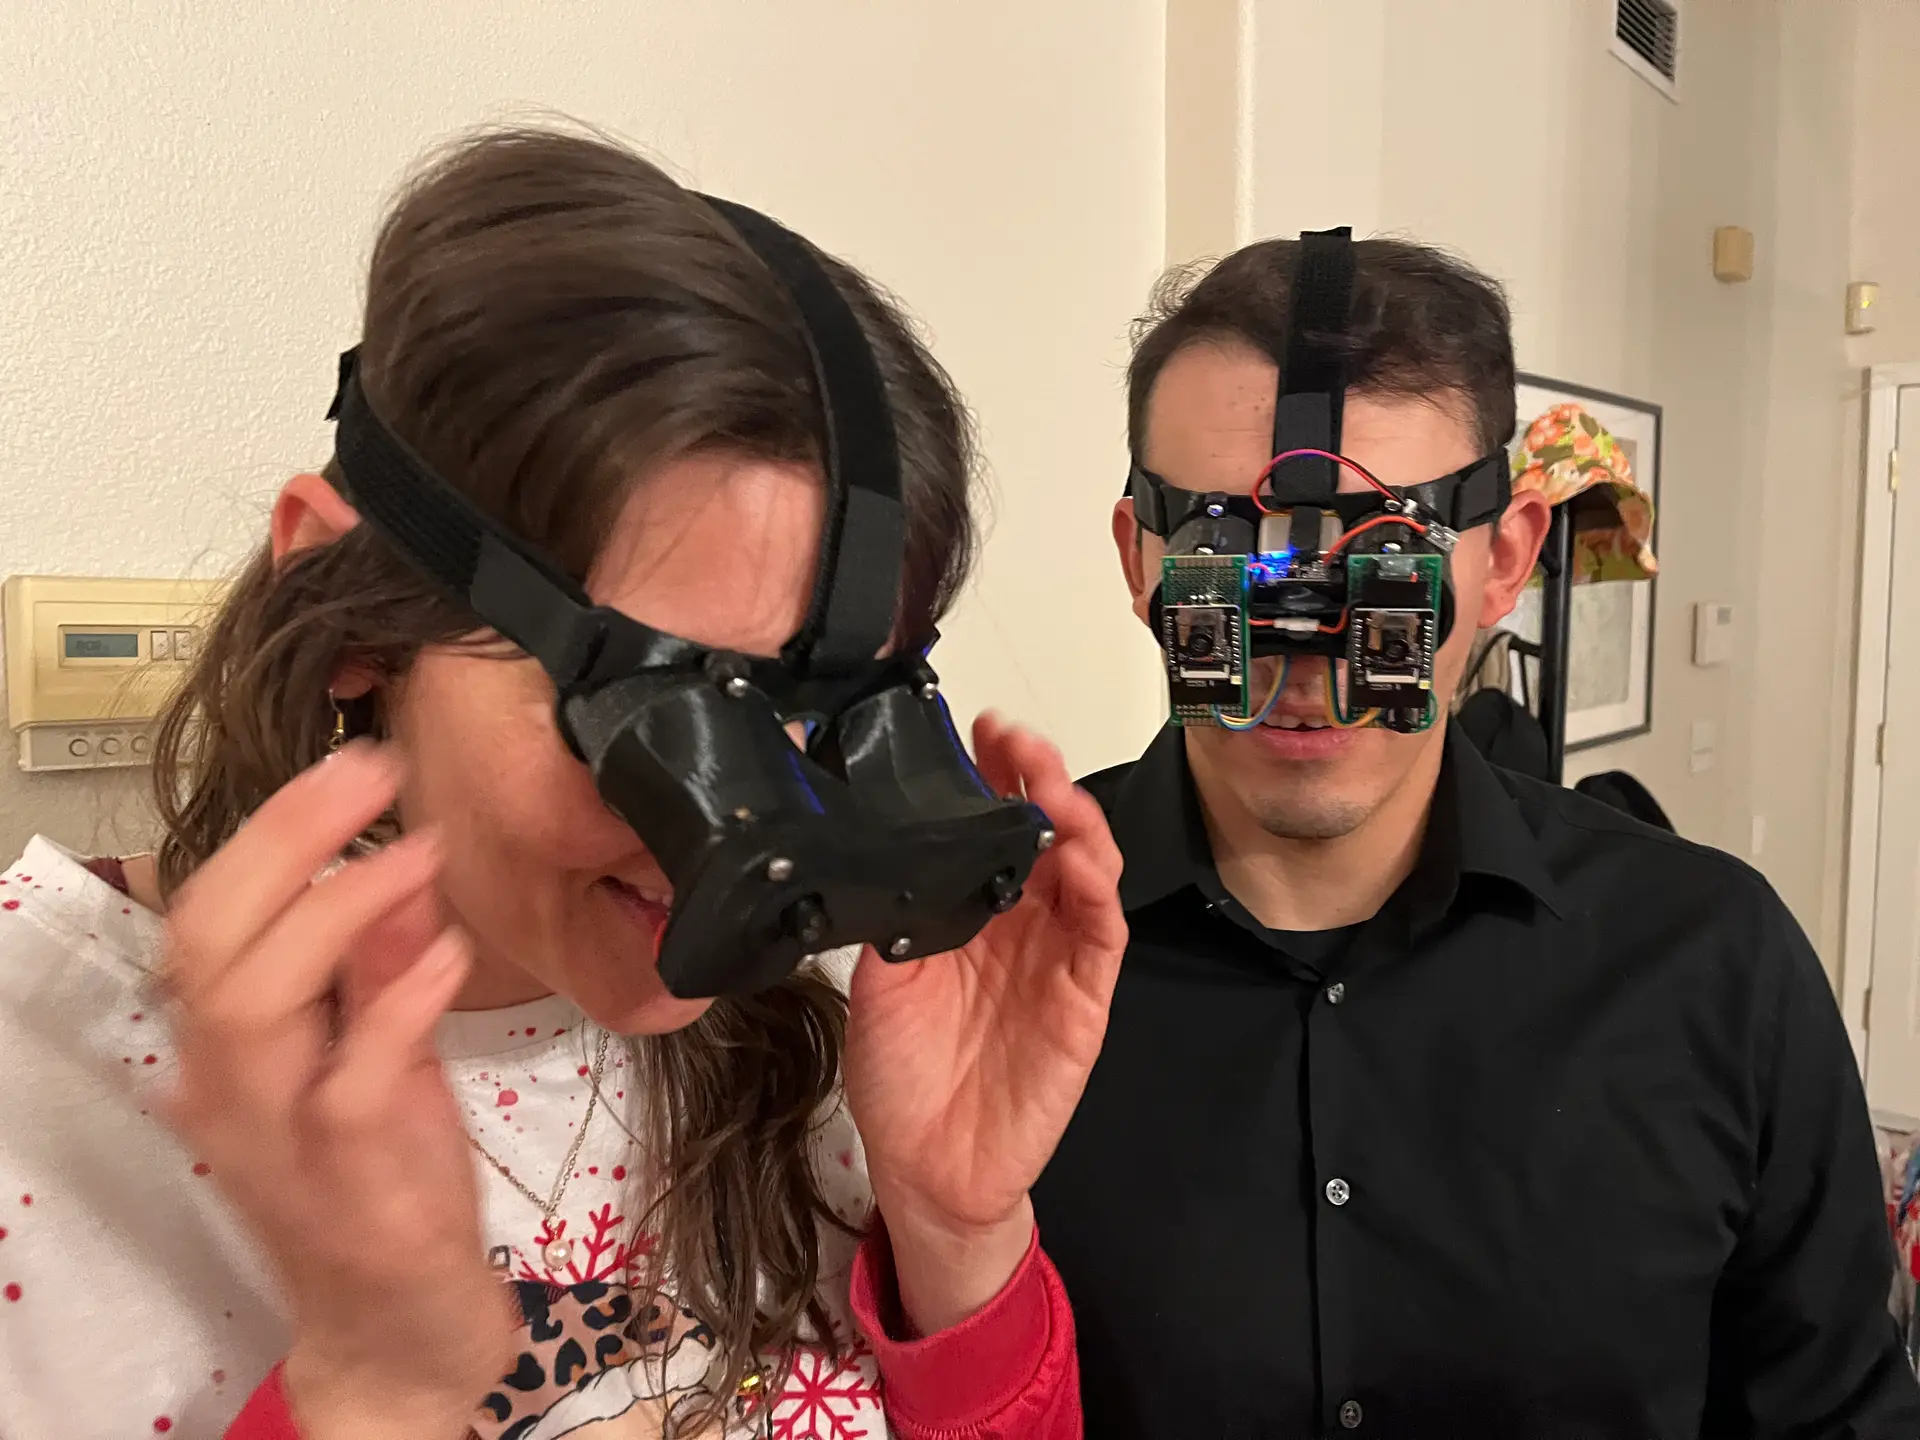
Responses varied from "why?" and handing the device back in 5 seconds to "Wow this is cool" and wandering around the house with it for 10 plus minutes. What kind of context do you even give for this kind of device?
For this kind of project I think the best feed is when someone has a joyfull experience using something that you enjoyed creating.
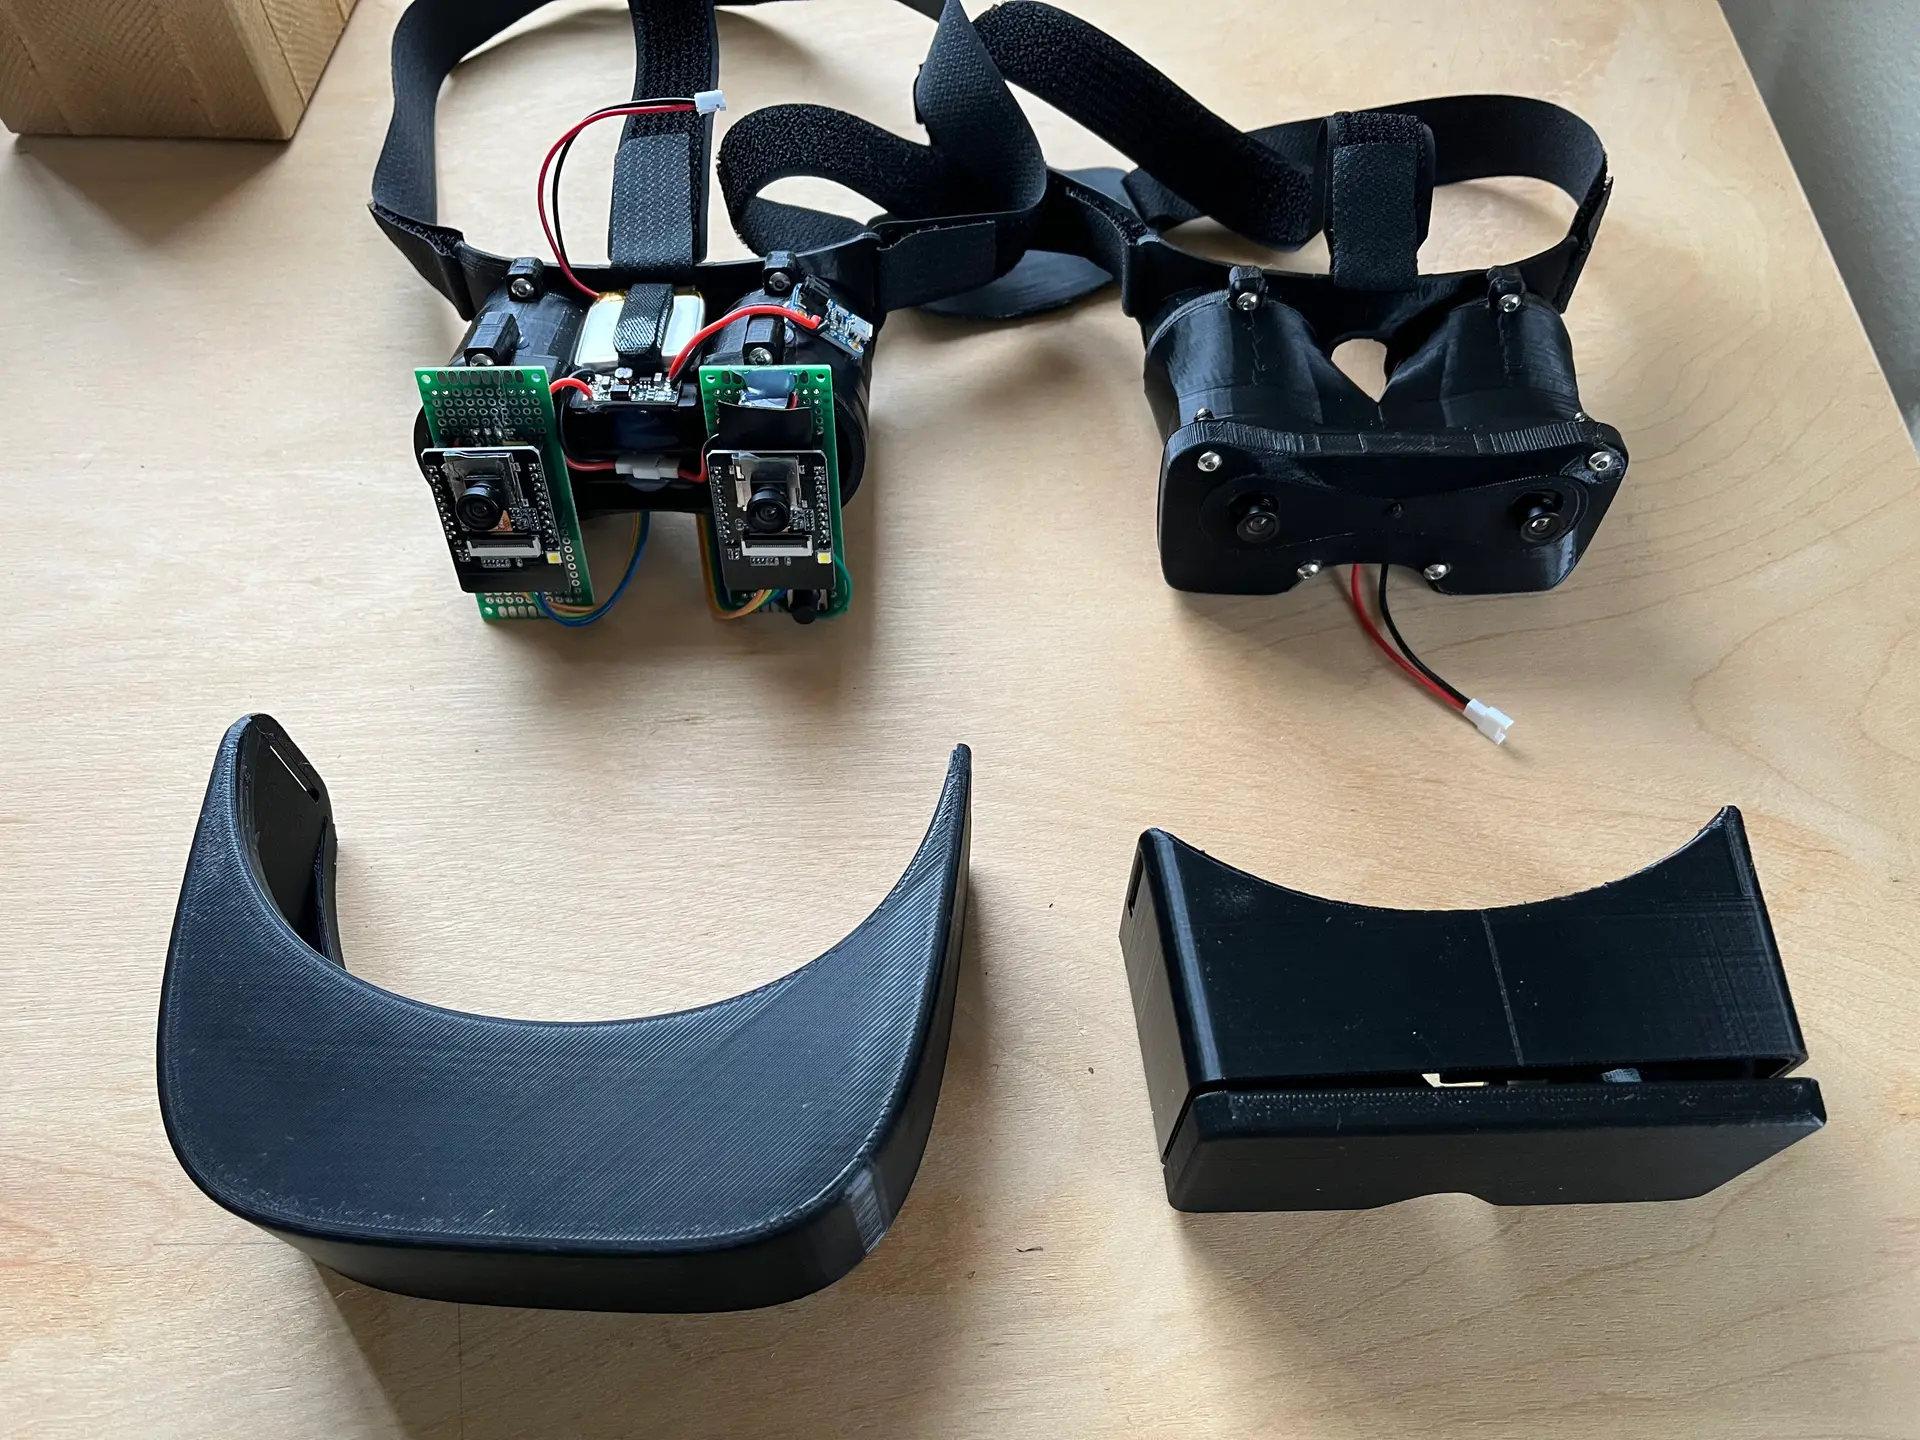
Design Variations
The bottom two headsets are variation of the design I experimented with. It's cool how you can take a design limited by in compactness by hand wiring and shrink it dramatically by using online manufacturing tools.
Taking a drive with the worst AR ever
What if it was color? but still Lo-Fi
Would it be better or even worse?" Is that possible?