
The Reality Remixer: A DIY Headset That Hacks Your Vision

When I started my World's Worst AR project I just wanted to see what the world would like at ultra low resolution. The AI features that I built into the product we're surprisingly less compelling than I expected. While scene description might be useful for a person with limited vision, I found it illusory.
What I enjoyed was the way that the headset immersed you into a hacked spatial visual reality as soon as you slipped it over your head, I found the 1bit pallete extremely limiting. You may have seen video where the Apple Vision Pro uses it's suite of sensors and processors to mix real and digital environments. It's truly impressive, but also truly expensive, both in price and processing. Could I build a reality remixer on the cheap? Maybe with a BOM cost below 50$
I think so.
What if it was color but still Lo-Fi?
With color I could add a whole new class of image filters, and the ESP32 is plenty fast enough to do processing on low resolution images. I started looking for a small color display that I could pair with the ESP32-CAM. A display using SPI protocol would be perfect and I found some color ones at 240px squared, perfect in sixe and shape for my headset. The ST7789 is a widely used, small, high quality IPS TFT display that is cheap and easy to buy. It also happens to be well supported for the Arduino and easy to hook up.
Getting the ESP32Cam to drive a color display with live video
Breadboarding the circuit was easy enough, and some example code worked great using a custom pinmap for the ESP32-CAM. I altered the Camera framebuffer setting to send color images directly to the screen buffer and it worked on the first try. Unfortunately I was all out of pins on the ESP32-CAM and would need to find a clever way to connect the two ESPs together. At this point I created some simple filters to test performance and discovered a funny bit packing bug; there's a big-endian > little-endian swap you have to do after modifying pixel values before sending the image to the screen. Otherwise the colors look re-mixed, but not in the intended way.
It works, passthrough and filtered
The trick to getting the two ESP32s to synchronize their applied filters is something call ESP-NOW. It's a wireless standard similar to Wi-Fi, but with a lot less overhead. You can pass back and forth small values to synchronize data between the two devices. It's easy to set up and works great. As a plus you can use ESP-NOW and Wi-Fi at the same time.
Designing new optics. I don't want tunneling, but I don't mind distortion
Since this is a reality-remixer, not a precision VR or AR headset, I don't need to worry about distortion, fringing or other optical issues that arise from putting cheap lenses in close proximity to each other. New (2025) optical designs for headsets are using a setup called a pancake lens, but these lose 75% to 90% of the light before it reaches your eyes. Pancake lenses are also extremely exspensive. So I did what any optical dilletante might do and just stacked a pair of bi-convex lenses. I did need to design and 3d print a test optical stack so that I could optimize the distances between the Screen, Primary Lens, Secondary Lens and the users eye. This tool was very helpful and additionally allowed me to shorten the optical path by more than a few milimeters from a single lens setup. My stack lens setup also does a great job filling your FOV and distoring the image for additional effect. One cool side effect of this design that you can clearly see the individual pixels at the center of the display.

From left to right, ESP32-CAM -> OLED -> primary bi-convex lens -> secondary bi-convex lens. This design is a lot simpler than a pancake or fresnel lens setup. It's also dirt cheap. But as stated above, there are some signifcant tradeoffs.
CAD is rad, but designing for faces is a challenge
We all have different face shapes, so creating a headset design without any dynamic fitment fixtures is not easy. Some Variations you have to account for are:
- Face width
- Interocular distance
- Eye to Ear distance (interaural?)
- Nose Position and extension
- Foot to Mouth?
- Head shape
- Brow shape
So what we're designing is something like a universal optical face manifold.
Cheat move the find average interocular distance
Find a 50th percentile head 3D model and work around that, good enough. If you're doing parametric design you can just measure the distance from pupil to pupil And work from that.

Designing a pcb that you can look into
With the interocular distance set and fixed into the model params I could start designing a PCB. With this project I wanted to start with a PCB so that I could skip the handwiring prototype step. I felt confident after my last experience that I could do this effectively. I was right, EasyEDA is great.
The Schematic
Very simple, the ESP32-CAM boards are only connected on VCC, VIN and GND.

The PCB
Labeled the Progammer pins this time, smart.

The Code
So many bad designs
Designing a headset that fits most faces, looks cool and fits your optical and electical stack is hard. I went through many iterations and too be honest am not entirely satisfied with my last design. The nose bridge and face gasket are where the worst of the work is.
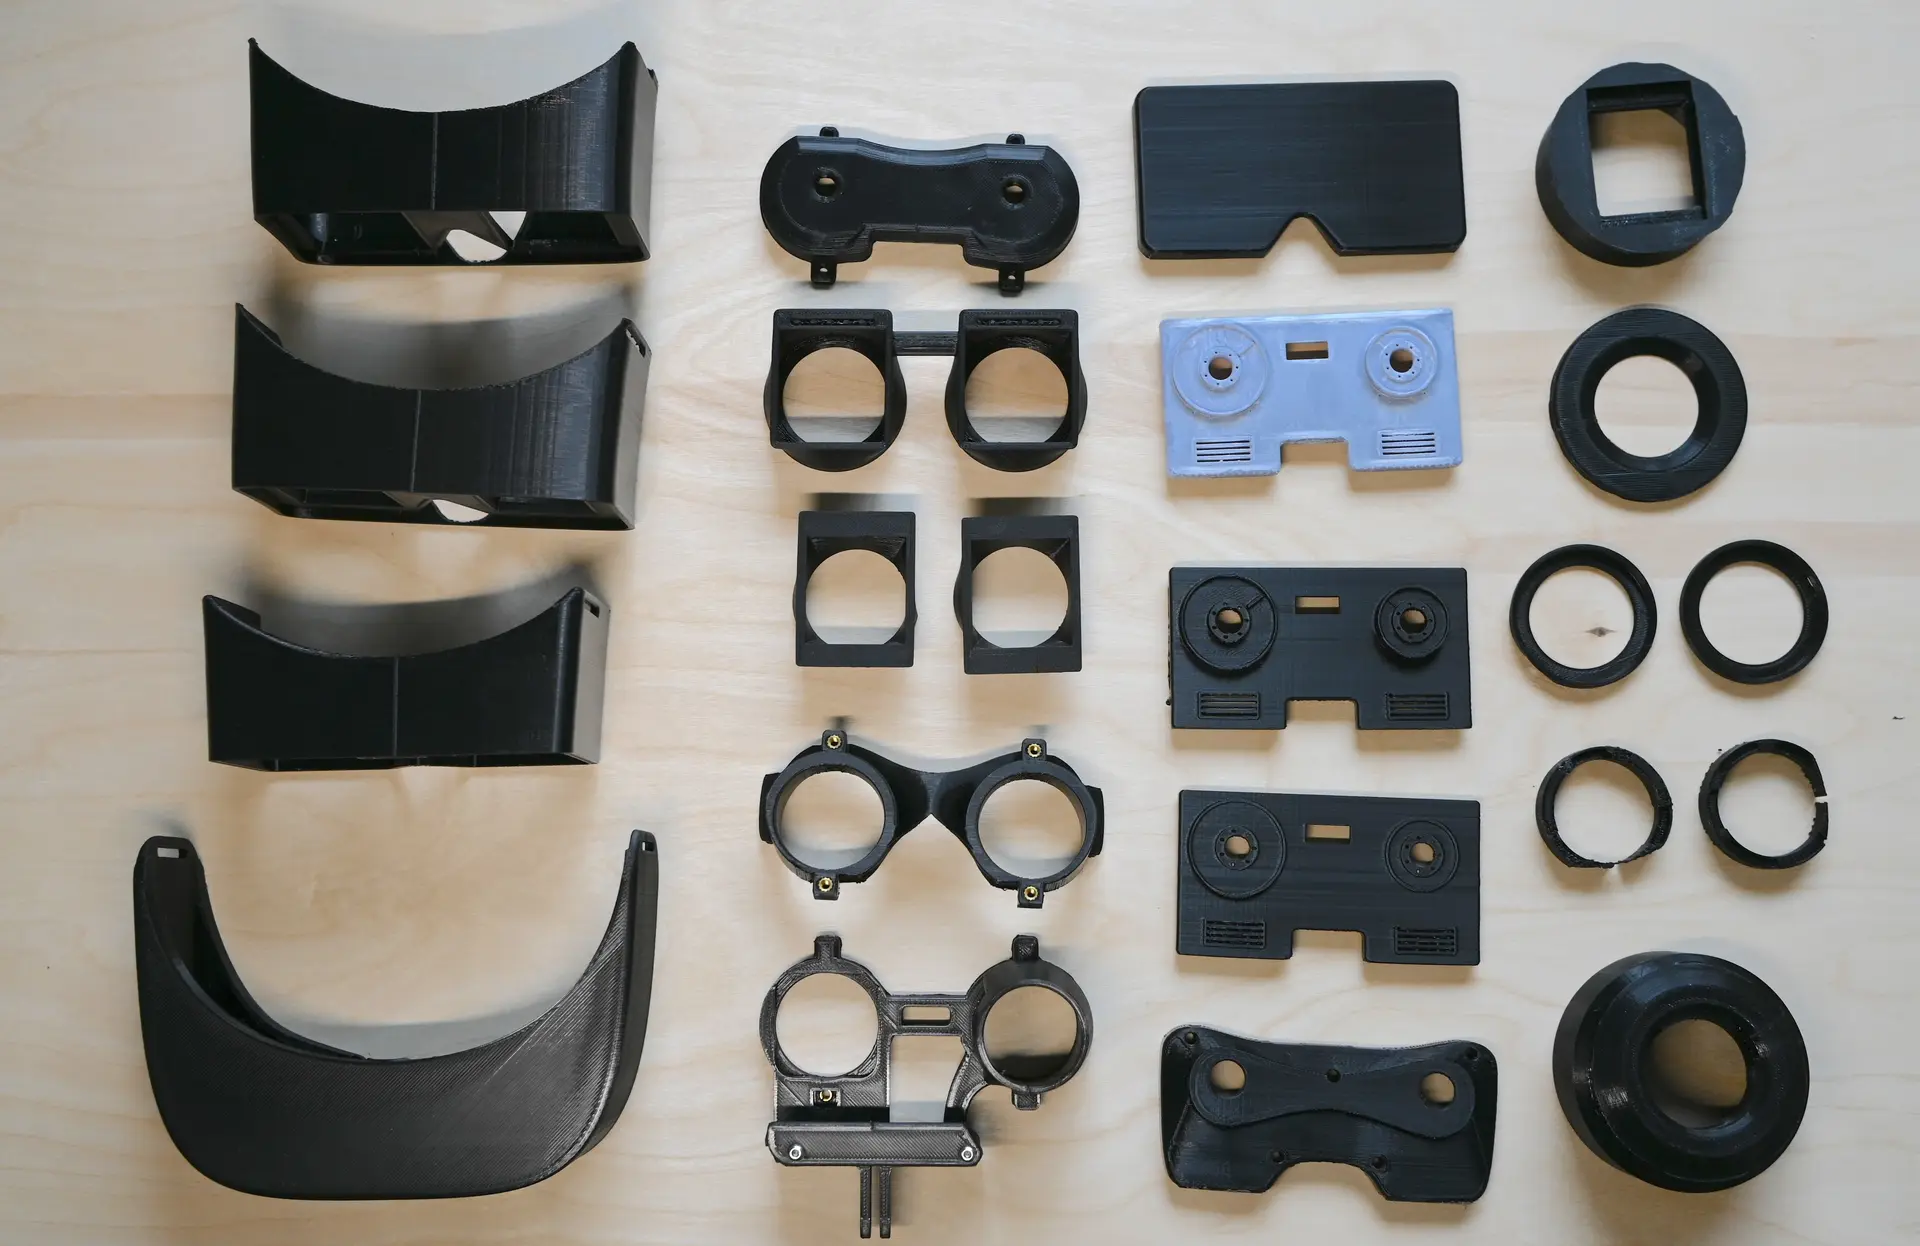
This is the last of the line. I wouldn't wear this last version for too long. There is a bin in my garage filled with bad designs and even worse prints.

A 3MF for you to look At
Skipping out on fasteners
You can use a 3d printing pen on seems in your model instead of designing in holes for fasteners. It's not pretty, but it works well for prototyping.
It works!
Feels totally different when you mount it on your face, minus the discomfort from the nose bridge. A few software tweaks for aligning the pixel output with the rotated camera and it works great.
A bunch of filters
A list of all the filters:
- "NORMAL" Just pass the pixels
- "DITHER" Compress the color pallete
- "GRAY" Convert to grayscale
- "GHOST" Make ghost traces from the previous frame
- "PIXEL" Pixelate the image
- "EDGE" Do and edge detection algorithm on the frame
- "TOON" Make it look toon like by combining Edge and Dither
- "OIL" Make it look like an oil painting, this one is slow
- "WATER" Water color
- "NEON" Make it Neon
- "SKETCH" Make it look like a drawing, 1bit
- "POP" Make it look like Pop art
Going for a walk with the Reality Remixer
One last thought:
You could use microOLEDs, add a 9 axis acceleromter, a inside-out tracking system and an AI super mega world model inference chip. Then again, you couldn't build that for 40$ in parts.